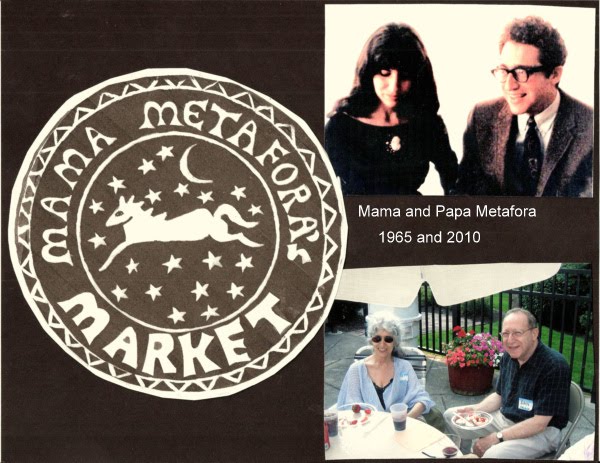
Monday, June 21, 2021

Armenian Ratatouille from Mama Metafora


Sunday, March 28, 2021

Jeanette Arax Melnick: examples from The Donkey Calendar 2022 PLUS her 2020 calendar for NJWO

 Before the placement below of her commissioned 2020 calendar, here are a few panels from Jeanette's new 2022 Donkey Calendar, a sort of love poem:


January


July


December


Here are the leaves of her 2020 calendar commissioned by New Jersey Wind Orchestra:


Monday, December 7, 2020

Video of Jeanette's art show PLUS Mama Metafora's Gingerbread Boy 2020-2021: Recipes. Peace and good health for the new year

Video of Jeanette Arax Melnick's Art Show:


                            Recipes for the 2020-21 Gingerbread Boy:                    


  In the 1980s. our family lived in Cambridge, England, for a year.  During the holidays, it was too expensive to send packages back to friends and family in the states. So we made these little recipe booklets, called the Gingerbread Boy.  When we came back home, we continued the tradition.  After a few years the booklets became letters, and email, when it came, made things even easier. Some years, the winter holiday “Gingerbread Boy” was sent out as a Valentine.  This helped keep the holidays less stressful.  This year I am sending it out during Christmas and Chanukah due to extra time on our hands from being in quarantine.

            Danny‘s Kalamata Olive Pasta

For four servings - Ingredients:
  Half a cup of pitted, drained ,and chopped kalamata olives
   2 cloves of garlic, finely chopped
  About one cup of chopped fresh tomatoes - little grape or cherry tomatoes are good in the winter
  3 Tablespoons olive oil
   Seasonings - a pinch of salt (olives already provide some salt); pepper to taste. If you like heat you can add crushed red pepper, or a jalapeño which you can sauté with the tomatoes.
  Herbs - a teaspoon dry or Tablespoon fresh - you can use basil, oregano, thyme , or herb of   
      your choice
  8 ounces pasta - linguini type works well
   Optional - freshly chopped parsley
Procedure
  1. Sauté garlic in olive oil-but don’t brown the garlic.  Add the tomatoes, and seasonings and herbs.  Sauté for about ten minutes while cooking the pasta.
  2. Drain pasta and add to olive-tomato mixture.  Can mix in some fresh chopped parsley if desired.
   I bring the frying pan to the table and serve from there - it's easy, fast, and yummy with a green salad.


Something Sweet - Blondies

     These blondies are a great hit with our grandchildren, and also their parents.
Fast, easy and they freeze well.  Do not need a mixer!
Ingredients:
8oz. Butter(2 sticks), melted.  I use unsalted for baking.
1 and 1/4 cup brown sugar, packed lightly
1/2 cup granulated sugar
2 eggs and one egg yolk - large size eggs
2 and 1/4 cups all-purpose unbleached flour
2 teaspoons cornstarch
1/4 teaspoon salt
1/2 teaspoon baking powder.

Instructions
1.prepare a 9” by 13” baking pan by buttering or lining with parchment paper. Preheat 
  oven to 350 degrees.
2.Whisk together the flour, cornstarch, salt, and baking powder in bowl.
3. In another bowl combine and stir well the melted butter, brown sugar, and granulated
    sugar and stir well.  Add the eggs and egg yolk and stir until smooth.
4. Gradually add dry ingredients to the butter-egg mixture until completely combined.

If you want add-ons, this is the time. Possibilities: 2/3 cup chocolate chips-dark or white chocolate, a cup of chopped pecans or walnuts.  Alas, our grandchildren like them without add-ons - one of them likes them plain, the others likes the simple icing i put on once they have cooled.  Recipe at end.

5. Mix in add-ons if using them.

6. Spread batter in prepared pan and put in oven-middle rack.
7. Bake for 25 to 30 minutes-until toothpick placed in center of pan comes out clean.
8. Cut after blondies have cooled on a rack.  

When cool and before cutting, you can add a simple icing - I melt 4 oz. of butter and dark chocolate (chips or cut small) melted, cooled for about 5 minutes and spread on the cooled blondies.  I usually frost only half the pan, for those who prefer the blondies without icing.


Sunday, September 2, 2018

Poppy Seed Lemon Squares

 Poppy Seed Lemon Squares

I offered to bring cookies to a recent event and my "Why Didn't You Make More Cookies" we're requested (from mamametafora.com post on  February 27, 2016). This was the recipe I developed for lemons sent by my dear friend from California - it was a poppy seed thumbprint cookie topped with homemade lemon curd.  I took them to a friend's party and they were gone within minutes. Many guests asked "Why didn't you make more?' Hence the cookie's name.  

However, a recent request was denied for lack of time. But now I have come up with a quicker and very nice alternative - a variation on classic lemon squares. These were also a big hit. and they are much faster to make.

Crust-preheat oven to 350 degrees F. Place rack in bottom 1/3 of oven, and use an 8-inch square pan, lined with foil.
8 Tablespoons unsalted butter(one stick) softened
1/4 cup granulated sugar.
1/8 teaspoon salt 
1 cup all-purpose flour
1 tablespoon poppy seeds

1. Melt butter which has been cut in chunks in medium saucepan over medium heat.  Remove from heat and stir in the sugar and salt.  Mix flour with poppy seeds and add to the pan. Mix a little, just until the flour is incorporated.
2. Press the dough evenly over the bottom of the pan, and bake for about 20 minutes or until the crust is lightly browned.

Topping
1/2 cup  plus 1 Tablespoon granulated sugar
1 and 1/2 Tablespoons flour
2 eggs
1 teaspoon freshly grated lemon peel
1/4 cup lemon juice

1. While crust is baking, stir the sugar and flour together in a medium bowl until well mixed.
Whisk in the eggs, stir in the lemon juice and zest.
2. When crust is ready, turn oven down to 300 degrees F. Pour filling over the crust.
3. Bake about 15 minutes or until topping is puffed at the edges and no longer jiggles in the pan when tapped.
4. Set on rack to cool completely.  Lifting ends of foil, transfer to cutting board.
Use sharp knife to cut into 16 or 25 squares.  I do the 25 - less calories.
5. Sieve powdered sugar on the bars just before serving.

The lemon bars may be stored in the refrigerator, airtight, for about 3 days.  I usually freeze the extras.  

Sunday, August 26, 2018

Cartoons from Arax - 2018


Tuesday, June 12, 2018

CANNELÉ FROM BORDEAUX

CANNELÉ FROM BORDEAUX


This winter, looking in Trader Joe's freezer I saw something new to me-Cannele-I liked the look of the little cakes on the box, the intriguing description of a dark firm exterior and a custardy interior.  I also liked the calories-only about 120 per small cake-lovely with coffee or tea.  We brought them home and Papa and I loved them-a good and lightish dessert.
But alas, sometimes Trader Joe's was out of them for a long time.  Then as I was looking through a favorite baking book by Dorie Greenspan, "Cooking Chez Moi" I noticed a Cannele recipe.  I found out they are from Bordeaux but are available in Paris and other parts of France. Traditionally they were baked in copper molds brushed with beeswax. Today most bakers use silicone molds and no beeswax.  Papa and I went online and ordered a silicone mold(about  $20) which were the exact size and shape of the Trader Joe product.  Easy recipe, no mixer needed-just an overnight refrigeration of the batter between baking.  The recipe was wonderful-even better than the Trader Joe's version if I must say so myself.

INGREDIENTS
2 cups milk(Greenspan calls for whole milk-but 2% is just fine)
Sugar divided:3/4 Cup and 1/2 cup
2 Tablespoons unsalted butter(one ounce)
1 cup flour(I use unbleached-whatever)
2 large eggs
1 large egg yolk
3 Tablespoons dark rum
1 teaspoon pure vanilla extract -optional

Procedure
  1. Bring milk, 3/4 cup sugar, and the butter to a boil in a medium saucepan.  Bring the mixture to a boil in a medium saucepan, occasionally stirring.  Remove from heat, let cool for 10 to 15 minutes-will still feel hot to touch.
  2. Sift the flour and remaining 1/2 cup sugar onto a piece of wax paper. Have a strainer ready.
  3. In a large bowl, beat eggs and egg yolk together with a whisk until blended.  Keep whisking while adding the hot milk-slowly at first. Add the flour mixture and whisk with energy.  When the batter is pretty smooth(a few lumps won't be a problem) strain it into a large bowl.  Discard the lumps that remain in the strainer.
  4. Whisk in rum and vanilla.  I often omit the vanilla, but the rum, never!
  5. Refrigerate the batter overnight -at least 12 hours.
  6. Brush the Cannele molds with melted butter and put mold in the freezer.  With the silicone molds, I ordered I only had to do the butter thing once-after that they come out like a dream.  I put the molds in the freezer when I put the batter in the fridge -so I won't forget and need to wait for the molds.
  7. Baking: Preheat oven to 400 degrees.  Take pan from freezer, pour batter into molds about 3/4 full.  Place mold on rack with a cookie sheet covered with parchment underneath.  Bake at 400 degrees for ten minutes then turn down the heat to 375 degrees.  I usually bake them for another hour-you want the canneles pretty dark-so you will need to play with the time a bit -all ovens are different.
  8. Let cool in pan for 10 minutes so they will hold their shape.  Then turn them out on a cooling rack. (I just use the rack they were baked on.)
  9. They are delicious warm or at room temperature.  These canneles freeze beautifully. 


Yield-16 little cakes-my pan makes 8 canneles -since I have only one pan, I just put the pan back in the freezer and bakes the remaining 8 the next day, or even the day after.

Information about the Cannele pan I ordered: the brand I found online is called-LEKUE(with accents over each "e" and they seem to be from Spain.  The quality seems excellent.  My pans are the 8 cup(as in 8 cakes-not measuring 8 cups)CANNELE BORDELAIS(REF. 0621108)